8.20.2014 - Making it your own

We all start somewhere.

Like dry sponges, we soak up everything that's put before us.   We wrestle with techniques and diligently practice, practice,  practice.  

Starting anything is a journey where we are inspired by someone or something.  We emulate someone while learning the basics... while the world watches.

Back in late 1998 I saw lampwork beads on eBay that piqued my curiosity.  I searched online for resources about lampworking.  I eventually ended up on Sundance's site - making lists of what I'd need to get started.

...because you’ve been so diligent and read so thoroughly, we are offering a beginner’s set - free...

After devouring Sundance's site - I found a hidden reward link they'd posted that went something like this:  

Burnt Offerings - JillSymons.com first beads!!


I ordered the kit and was soon on my way.  It consisted of a small fiber blanket, release, mandrels and a few shorts of glass. I added a plumbers' torch from the local hardware and I was on my way.  The oxygen deprived flame scorched and muddied most of the opaque colors - but even so, I knew I was hooked!  I kept a blog for awhile where I posted images of my work's progression... take a look here: JillSymons.blogspot.com 

I also found an article in an early issue of Bead and Button magazine (circa 1996) that interviewed Andrea Guarino (Slemmons) (Please forgive my memory - as I can't find that issue anymore - but loosely - this is what it said to me.)  I strongly agree with what was said, that while we all  need to start somewhere - copying is ok, but it's always good manners to credit your teacher/source.  

February 1996 Bead and Button

It went on to say that when you master a technique, move on and modify it to make a design that's your own. In other words - Find Your Own Voice, this helps to define who you are as an artist.  While coming up with a design that is your own is great - it's usually not very long before people are copying it *in some form or another*... so - always be moving forward on to new things AND if you're still making that signature bead , you'd better make sure that YOU are the one who still does it best!  

My Weekly Wednesday Update each week has helped me always move my designs forward.  This is paramount in my work, as people come here looking for things that delight, new things each week, or they don't come back.  

I think many factors go into the making of an artist - these are just some of the things that shaped me into who I am and how I think...  what and/or whom inspired you?

Smiles, Jill

7.25.2014 - Progression of an idea...

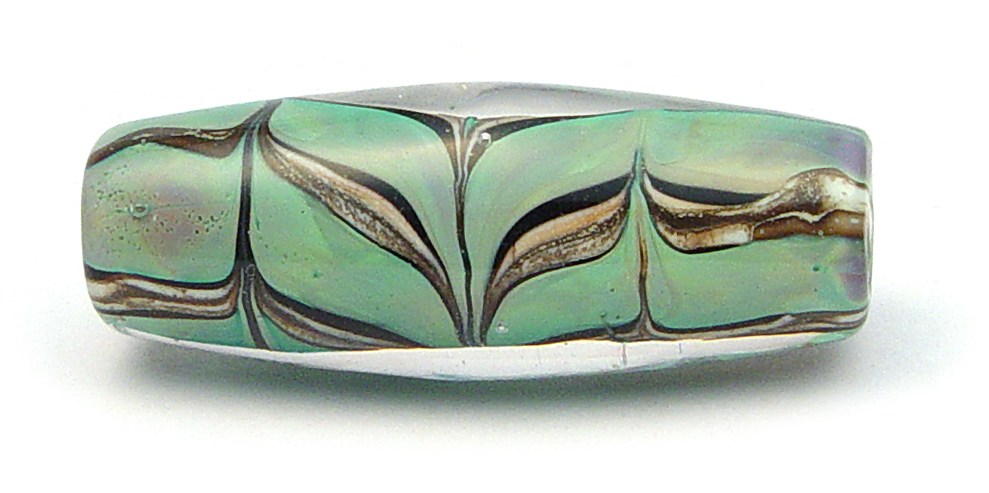
I have always enjoyed making raked/feathered beads and felt a distinct tug this morning in that direction.  I'd been reading about what has caused Terra 2 to be unlike the original Terra... so - set out to make a focal to see if I could get it to strike in all those wonderful ways.

I realized that I don't like the results from my experiment - as the green just has tinges of plummy/purples at the ends... but what I did like was the "fluke" design - its crispness... and although somewhat organic, the encasing makes it too dressy. IMHO

Terra 2 Fluke Focal - JillSymons.com

Next try is 'ditch' the Terra 2 - go for more drama... DH Psyche... While my results of late seem all over the place with this color - I am liking the "Kronos/Picasso blue/green OPAQUE color" I'm getting, and know if I hit it with a nice reducing flame - I can get some metallic effects.  YES!

Psyche Fluke Sm. Focal - JillSymons.com

So then we're off to the races... hmmm - how does one make a directional rake on a round cab.  I am taking the liberty of assuming that this will be set with this direction in mind.  I've raked up and down - while they do look like whale flukes, I now remember a focal I'd previously made - called Sea Grasses (yes, Louise - yours) - that had a similar look.  BUT.THIS.IS.A.CABOCHON. (so it's ok). 

This is the final result - *below* - I love it - and proceed to make two more! : )

4.23.2014 - Spirals & Stringers

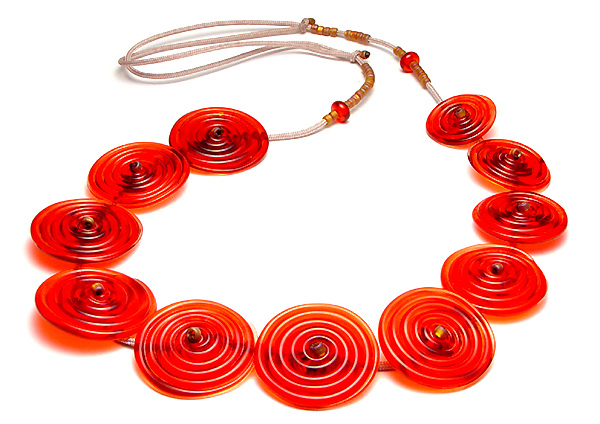
I got to thinking about the wound spirals I make, and thought oh - it's because I use boro stringers - that all have a nice consistent diameter.  Well, that's true for the clear - but the colored ones are made from rods - I like to pull from 7-8mm dia. rods.  As I pull the stringer, it's spiraled up on the other side of the torch.  Feed boro in from the front of the torch - mandrel in back, catching the stringer and winding it up.  Does that makes sense to you?
 

Red Boro Zinger Spiral Necklace - $250

That got me to thinking about how new lampworkers are taught to pull stringers.  I've heard about heating a rod in the middle and pulling out each end  with the stringer in the middle.  Or puntying on with a stainless steel chopstick.  I think Corina was just talking about how not to use tweezers, because the stringer retains the tweezer shape for a couple of inches in initial pull stages - and how that can get to be expen$ive if it's silvered glass your'e tossing away!

When I need a length of stringer, I pull using needle nose pliers... 
I fix my eyes about 1 1/2" to the right of the flame.  I slowly feed a thick rod from the left and pull to the right... always watching that same check spot 1 " to the right of the flame.  I pull about an inch, then let the glass slightly chill and set the diameter to what I need... once that's been established, I can control the speed at which the glass is fed into the flame from the left and simultaneously control the speed & temperature of the glass I'm pulling from the right. 

Do I have a stringer stash? Sheesh... I wish, but cataloging yet another thing is not in my mental makeup.  There is a sense of freedom pulling fresh ones each time!